 Mention the words ‘student visa’ to a group of foreign undergrads in Argentina and you’ll hear irritated sighs followed by stories of waiting hours in line only to discover one is in the wrong line, has the wrong documents and has wasted hours of their life.
Images of getting lost, having to return repeatedly and an absence of toilet paper in the bathrooms of the immigration building fill the student’s head, discouraging one from even attempting the process.
When it’s easier to hop over to Colonia del Sacramento, Uruguay every three months to renew the 90-day tourist visa, applying for a student visa doesn’t seem worth the tremendous hassle. At a cost of AR$300 and with a considerable amount of bureaucracy involved, one may begin to wonder why they should even bother with the student visa.
Getting a Student Visa is Important, Despite the Hassle
Officially, the government requires student visas for those studying in Argentina for more than 90 days. But the real reason it’s important for exchange students to follow-through with the student visa paperwork is because student transcripts might not be sent to one’s home university without one.
“If you fail to process your visa, you run the risk of not receiving your transcripts at the end of the semester,” said Alie Church a study abroad consultant in Buenos Aires. Church said some universities refuse to send transcripts without a visa in order to comply with the law and avoid fines.
Though a few more lackadaisical universities don’t strictly enforce the policy, those who want to be sure they will receive credits should go through the hassle to get their student visa. As an added bonus, the student visa serves as proof of residence for cheaper airfare in Argentina, discounted entrance fees for national parks such as Iguazú Falls and facilitates sign-up for programs such as Mejor en Bici.
A standard student visa is valid for six months, but if you’re studying for longer, you can get a visa valid for one year by submitting a background check from your home country. The exact requirements vary depending on one’s nationality and it’s important to check with your country’s embassy for further information. Though guidelines and details are subject to change for students from non-Mercosur (Union of South American) countries, there are three steps to obtaining a student visa.
Step One: Criminal Background Check
Before your mind races to anything illegal you’ve been busted for at home, the background check for a six-month visa only applies to your time spent in Argentina. With that said, in the unlikely event you’ve had a run in with the law in Argentina, it generally can be solved.
“Having a record does not automatically disqualify you from receiving a student visa,” Church said. “However, it does mean that you are subject to any penalties enforced for the crime committed.” Depending on the crime, you can probably pay a fine to solve the problem before beginning the visa process.
For those who aren’t on the ‘Most Wanted’ list , obtaining the police record is relatively easy. You do this by scheduling an appointment at Registro National de Reincidencia to get a police record certificate (certificado de antecedentes penales).
For those in Buenos Aires, schedule the appointment at Piedras 115, located in Microcentro. By mid-morning, the line is out the door, so arrive early and bring something to keep you occupied such as a book to read. You’ll need to bring your passport, a photocopy of the passport, AR$+ and information about your address and parents’ names. Make sure to check exactly what’s required on the website after scheduling the appointment.
When you arrive, check in at the front desk and give them your appointment number. You will be sent to a different box to pay the fee, and then you’ll wait for your name to appear on the monitor. You’ll then be called into an office, asked a few questions and your fingerprints will be taken. The official will give you a website address and a code. After five days, follow the instructions the official gives you to obtain the police report. Print it out for the next step.
Step Two: Spend Some Quality Time at the Immigration Office
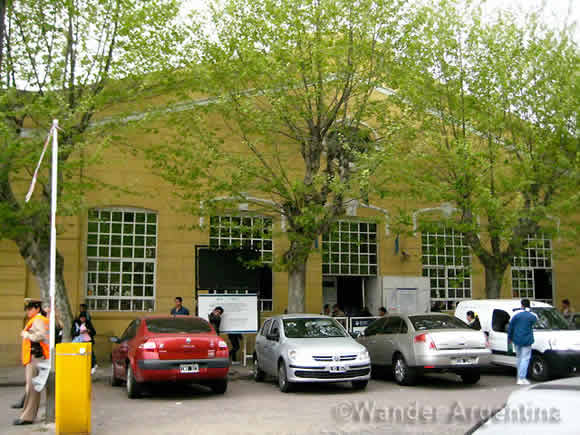
 This next step will take the most time and work. Pay careful attention to everything you need to avoid having to make a return trip to the immigration office. After completing the background check, make an appointment at the immigration office (Dirección Nacional de Migraciones). Click on ‘residencia tramite 1ra vez para mayor de 16 años.’ The office is located at Antartida Argentina 1355 in Retiro.
What to bring:
1. Original passport
2. Photocopy of every page of the passport
3. Two 4×4 photos on a white background
4. Proof of registration at an Argentine university
5. Argentine Federal police record certificate
6. AR$300 in cash for the migration fee
Suggested optional items:
1. Snacks
2. Tissues in case you need to use the bathroom or catch a cold
3. A book or something to keep you occupied. It’s not recommended to bring a laptop or other expensive electronic gadgets.
Make sure to bring everything listed, otherwise you could be denied a visa or have to keep returning until you have everything required. Church says that in most cases, the process will just take longer if you forget something. If you are missing a document, ask the official specifically what you need to bring for your next visit.
“Unlike in other countries, I feel like there is always a way to fix things here,” Church said. “You might be questioned, asked to pay a fine, have to gather additional documents, etc., but generally, I feel like there is always a way to find a solution. You just have to be very patient and persistent.”

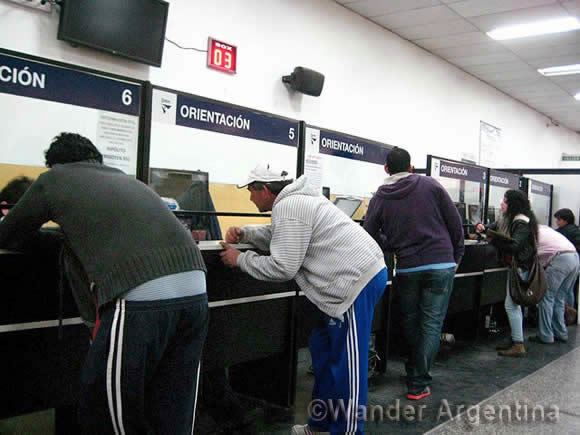
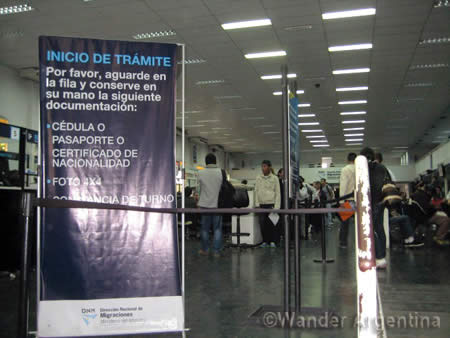
Entering the Migrations office can be like entering a human zoo — expect hoards of people from all over the world, long lines and a good serving of chaos.
Endless lines don’t appear to move and there is no real direction for which line is which. Find the ‘non-Mercosur’ line, which is thankfully much shorter than the other, and be prepared to be shuffled around from box to box and to wait while your official finishes their round of mate before taking your documents.
At the first window, you’ll need your 4×4 photo, passport and your fingerprints will be taken. You probably won’t be able to hear the person on the other side of the glass, so be patient, ask them to repeat and practice lip reading in Spanish.
You’ll then be asked to sit and wait for your name and photo to appear on the monitor. This can take a while, so again bring something to keep you occupied and food to eat. You can purchase food there, but it can be pricey and it has probably been sitting out all day.
When your name is finally called, present all the other documents you have as well as your parents’ names. This step will consist of you going back and forth between sitting and standing at the box and being asked some questions. You will be asked to pay the AR$300 in cash at a different box, then return to finish the process. Once finished, you will receive the preliminary certificate of residence (certificado de residencia precaria).
Step 3: Return to Pickup the Visa
The last step is the easiest and most rewarding. Return to Retiro in 20 days with your preliminary certificate of residence and other documents to pick up the official visa paper.
Your visa is valid for six months, so if studying in Argentina for a longer period, you will have to reapply. Remember that guidelines can change and depend on your nationality, so verify with your embassy or consulate before beginning the process. — by Rachel Aretakis

